
There’s nothing like capturing the beauty of nature through landscape drawing. Standing before a majestic mountain range or a serene lakeside, you can translate the scenery onto paper. It’s both challenging and rewarding.
If you’re new to landscape drawing, don’t worry. With the right guidance and patience, you’ll soon create stunning outdoor scenes. These will leave a lasting impression.
In this guide, we’ll cover the essential tools and techniques for landscape drawing. You’ll learn about the right art supplies and the principles of perspective and composition. This will help you capture the essence of nature on your canvas.
Whether you’re a beginner or an experienced artist, this article will inspire you. You’ll gain the knowledge to improve your landscape drawing skills.
Table of Contents
Essential Art Supplies for Landscape Drawing
Are you into nature sketching or plein air painting? The right art supplies can change your game. From picking the best paper to choosing the right tools, we’ll cover what you need to draw the outdoors.
Choosing the Right Paper and Surfaces
The base of your landscape drawing is the paper or surface. Go for heavy-weight, textured papers for outdoor use. Smooth bristol board or hot-pressed watercolor paper are perfect for details. Cold-pressed or rough paper adds texture to your nature sketching pieces.
Drawing Tools and Materials
Get a range of drawing tools like graphite pencils, charcoal, and colored pencils. Try different hardnesses and shades for the look you want. Also, pack a good eraser and a sketchbook to keep your work tidy.
Portable Equipment for Outdoor Sketching
For outdoor plein air painting, bring a portable easel or drawing board. A small container for your tools and a water-resistant bag or portfolio for your art are must-haves.
Having the right tools and materials is key to great landscape drawing. Quality art supplies will help you capture nature’s beauty in your nature sketching and plein air painting work.

Understanding Basic Landscape Composition
To make a stunning landscape rendering or rural scenery depiction, you need to know the basics. These rules help you arrange your drawing’s elements. This makes your scene both engaging and balanced.
The rule of thirds is key. Picture your canvas split into nine parts with lines. Place your main points on these lines or in the sections. This makes your drawing more lively and attractive.
- Try putting your horizon line in the upper or lower third. This adds space and depth to your scene.
- Use the rule of thirds to place important features like trees or mountains. This draws the viewer’s eye to the best parts.
Leading lines are also important. These are paths for the viewer’s eye, like roads or rivers. By placing these lines right, you can lead the eye to your main point or add depth.
“The key to a successful landscape composition is to create a sense of balance and harmony, while also guiding the viewer’s eye through the scene.”
Think about the depth of your scene too. Use foreground, middleground, and background elements. Overlapping and changes in scale add depth and make your drawing pop.

By using these basic rules, you can make landscape renderings and rural scenery depictions that grab the viewer’s attention. They show off your artistic vision well.
Mastering Perspective in Outdoor Scenes
To capture the depth of a countryside drawing, you need to understand perspective. Mastering linear and atmospheric perspective helps create a sense of depth. This makes your landscape artwork come alive.
Linear Perspective Techniques
Linear perspective uses lines to create depth. When drawing landscapes, focus on the placement of buildings, roads, and horizon lines. Try different perspectives like one-point, two-point, and three-point to get the right feel.
Creating Depth and Distance
Creating depth in your drawings is key to showing the vastness of nature. Use overlapping objects, varying scales, and atmospheric perspective to guide the viewer’s eye. Closer objects should be more detailed, while distant ones should be softer and hazy.
Atmospheric Perspective Tips
Atmospheric perspective simulates how we see distant objects. To use it well, consider these points:
- Color: Distant objects look hazy and bluish.
- Value: Distant objects are lighter and less contrasted.
- Detail: Distant objects are less detailed and more blurred.
By mixing linear and atmospheric perspective, you can improve your drawings. This creates a sense of depth and realism that grabs the viewer’s attention.

Natural Light and Shadow Techniques
Learning to work with natural light and shadow is key for amazing landscape artwork and scenic illustration. It lets you add depth, atmosphere, and realism to your drawings. This is done by capturing the subtleties of light.
Watch how light changes on surfaces. Notice how shadows grow and fade with the sun’s movement. Try drawing cast shadows, direct light, and soft diffused light to make your scenes pop.
Also, pay attention to light quality. Dawn and dusk light is warm and magical, while midday light is sharp and dramatic. Use these differences to bring your landscape artwork and scenic illustration to life.

Understanding light and shadow also means knowing about value and contrast. Use darks and lights to create depth and interest. Try a simple color palette to highlight light and shadow or use many values for detailed scenes.
The goal of landscape artwork and scenic illustration is not just to copy what you see. It’s about interpreting and enhancing the world through your art. By mastering light and shadow, you can make your drawings come alive and engage your viewers.
Elements of Landscape Drawing: From Foreground to Background
Making a beautiful landscape drawing needs a sharp eye for details. From the big trees up front to the far-off mountains, each part is key. We’ll look at how to draw these parts well.
Drawing Trees and Vegetation
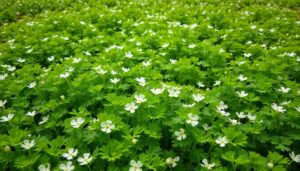
Trees and plants are central to any landscape, adding depth and texture. Focus on shapes, branches, and light effects when sketching them. Use techniques like hatching or cross-hatching to detail bark and leaves.
Depicting Water and Reflections
Water in nature sketching is amazing, reflecting the world around it. Learning to draw water and its reflections can really improve your landscapes. Watch how water’s tone and texture change with light. Use wet-on-wet and dry brushwork to capture water’s movement.
Rendering Mountains and Rocks
Mountains and rocks make great backgrounds in landscapes. When drawing them, notice their shapes, textures, and how they look with light. Use shading, like different values and edges, to make them look deep and real.
Improving at drawing these landscape parts will help you make stunning nature sketches. Keep practicing, trying new things, and watching the world. You’ll be amazed at how your outdoor art can grow.

Weather Effects in Landscape Artwork
Landscape artists face a thrilling challenge: capturing the natural world’s changing moods. From stormy skies to misty mornings, weather effects can bring your plein air painting and landscape rendering to life. Let’s dive into some techniques to masterfully depict the elements.
Painting Dramatic Skies
The sky defines the mood of a landscape. Experiment with turbulent clouds, sunlight rays, or stormy skies. Observe how light shapes shadows and highlights.
Rendering Rain, Mist, and Fog
Mist and rain add mystery and atmosphere to your work. Use soft strokes for misty veils or splattering for rain. Water vapor changes how we see colors and clarity in your landscape.
Evoking Wind and Motion
Unseen forces like wind can be brought to life in your drawing. Use lines and forms to show trees swaying or grass bending. Think about how these movements might change the look of your scene.
Adding weather effects to your plein air painting and landscape rendering makes your work more engaging. Stay connected to nature’s changes. Let your art show the beauty and power of the elements.
Common Mistakes to Avoid in Landscape Drawing
Learning to create landscapes well takes time and effort. Knowing common mistakes can help you avoid problems. As you get better at sketching rural scenes and countryside, watch out for these three issues.
Proportion and Scale Issues
Getting the size and proportions right is a big challenge. It’s easy to get the sizes of things wrong, making scenes look off. Make sure the sizes of things in the front, middle, and back match up well for a natural look.
Texture and Detail Balance
It’s important to find the right mix of detailed work and loose brushstrokes. Don’t overdo it, or your drawing might look too busy. Focus on the main textures and details, keeping other parts simple.
Value Distribution Problems
Using value (lightness or darkness) well is key to depth in your drawings. Pay attention to how you use dark, medium, and light values. This helps guide the viewer’s eye and keeps the scene balanced.
Avoiding these common mistakes will enhance your landscapes, helping you create stunning rural scenes and captivating countryside art.

Building Your Landscape Drawing Practice Routine
Creating a regular landscape drawing practice is key to improving your skills. Start by setting achievable goals, like spending a few hours each week outdoors or doing a daily drawing. Look for inspiration in the world around you, like forests, lakes, or mountains.
When you’re out, pay close attention to the small details that make each scene special. Try drawing fast to capture the essence of what you see. Use tools like viewfinders to focus on certain parts or add depth with atmospheric perspective.
Sticking to a routine is crucial for bettering your landscape artwork and mastering natural environment portrayal. Don’t be afraid to face challenges and celebrate every small victory. With a consistent practice, you’ll grow your skills and confidence, turning your drawings into stunning art.
FAQ
What are the essential art supplies for landscape drawing?
For landscape drawing, you’ll need high-quality paper and drawing pencils. Don’t forget erasers, sharpeners, and a portable drawing board or easel. You might also want colored pencils, watercolor paints, and sketchbooks for outdoor sketching.
How do I create a balanced and visually appealing landscape composition?
To make a balanced landscape, focus on the basics. Think about where to place elements like the horizon line and focal points. Use the rule of thirds and balance positive and negative space.
What techniques can I use to capture perspective in my landscape drawings?
To capture perspective, learn about linear and atmospheric perspective. Linear perspective uses lines to create depth. Atmospheric perspective fades details and colors to suggest distance.
How can I effectively portray natural light and shadows in my landscape drawings?
To show natural light and shadows, observe the outdoor light and shadow patterns. Notice the light’s direction and intensity and how it affects the scene. Use value changes to make your drawing look three-dimensional.
What are some common mistakes to avoid when drawing landscapes?
Avoid mistakes like wrong proportions and imbalance in texture and detail. Make sure elements are the right size and balanced. Aim for a smooth light and shadow balance.
How can I build a consistent landscape drawing practice routine?
To keep a regular practice, set goals and find inspiring places to draw. Schedule time for sketching and do plein air sessions. Use references to improve your outdoor sketches. Always check your progress and adjust your routine as needed.


1 thought on “Landscape Drawing: Master the Basics with Expert Tips”